Search This Blog

Thursday, December 8, 2011

Galompkis - aka Stuffed Cabbage Rolls

What is a Galumpki? From where my mother's side of the family comes from, it is what stuffed cabbage is called. There is a whole debate out there amongst my mother's family on not only the spelling of galumpkis, but also what you put inside and on top of them.

My recipe comes from one of my Mother's Sister's daughter... my cousin. I have no doubt when and if they read my blog, I will get comments on how I put this recipe out here incorrectly. Alas... being a Pitzel by nature, I don't care!!

It's a rather simple recipe, cabbage, ground meat (in this recipe I used ground turkey, but you can use ground beef or a combo of ground beef and pork)& rice. Pretty basic right?

Let's start with the cabbage. Ah, the cabbage, the pungent smell of cooking cabbage. You must choose your cabbage head wisely. The best size is between 6" - 8" in diameter. A cabbage head too small would produce a galompki the right size fora small child. And we know they tend to be wasted on the child, they don't seem to have the same taste for this delicacy as we adults. A cabbage head too large would produce a galompki just the right size for my 6' 4" husband!

The secret to making the unique and flavorful galompki just right is the cabbage leaf. The recipe calls for cooking the cabbage just right, so as not to overcook making them too soggy and they will fall apart or under cook the cabbage leaves which causes them to be tough and impossible to roll.

Put a large pot of water on the stove and bring to boil, this will be for the cabbage.

While waiting for the water to boil, prepare the filling:
* I used 3 lbs of ground turkey, but my recipe calls for 2 lbs of ground beef and 1 lb of ground pork.
* 1 large onion finely chopped
* salt & pepper
* 1 egg (used as binder)
* 1 cup uncooked white or brown rice
* 2 cups water
Bring 2 cups of water and rice to a boil, then turn of stove and let sit.
Mix all ingredients together except for the rice.
Drain rice, and add the rice to the meat mixture and mix well.

Preparing the Cabbage Leaves for rolling:
* Two cabbage heads 6'8" in diameter
* Cut the core out of the cabbage
* Place cabbage in a large kettle of boiling water
* Simmer until leaves are pliable but not soft!
* Pull off leaves one at a time as they get pliable. This goes fast, be ready!


Assembly of galompki:
* Large bag of sauerkraut

Lay a cabbage leaf with the big vein facing down. Place 1/4 cup of filling on top of lower part of cabbage leaf. Roll up the cabbage leaf a little, then tuck the sides in and finish rolling. Just like an eggroll.


Place finished cabbage rolls on a separate plate. There will be extra cabbage leaves left over once all of the meat mixture has been used. Place some of these leaves on the bottom of a sturdy large dutch oven.


Stack rolls on top of the leaves, once you have a layer completed, put a layer of sauerkraut on top of them. Put the next layer of rolls and another layer of sauerkraut. Top this with more cabbage leaves.


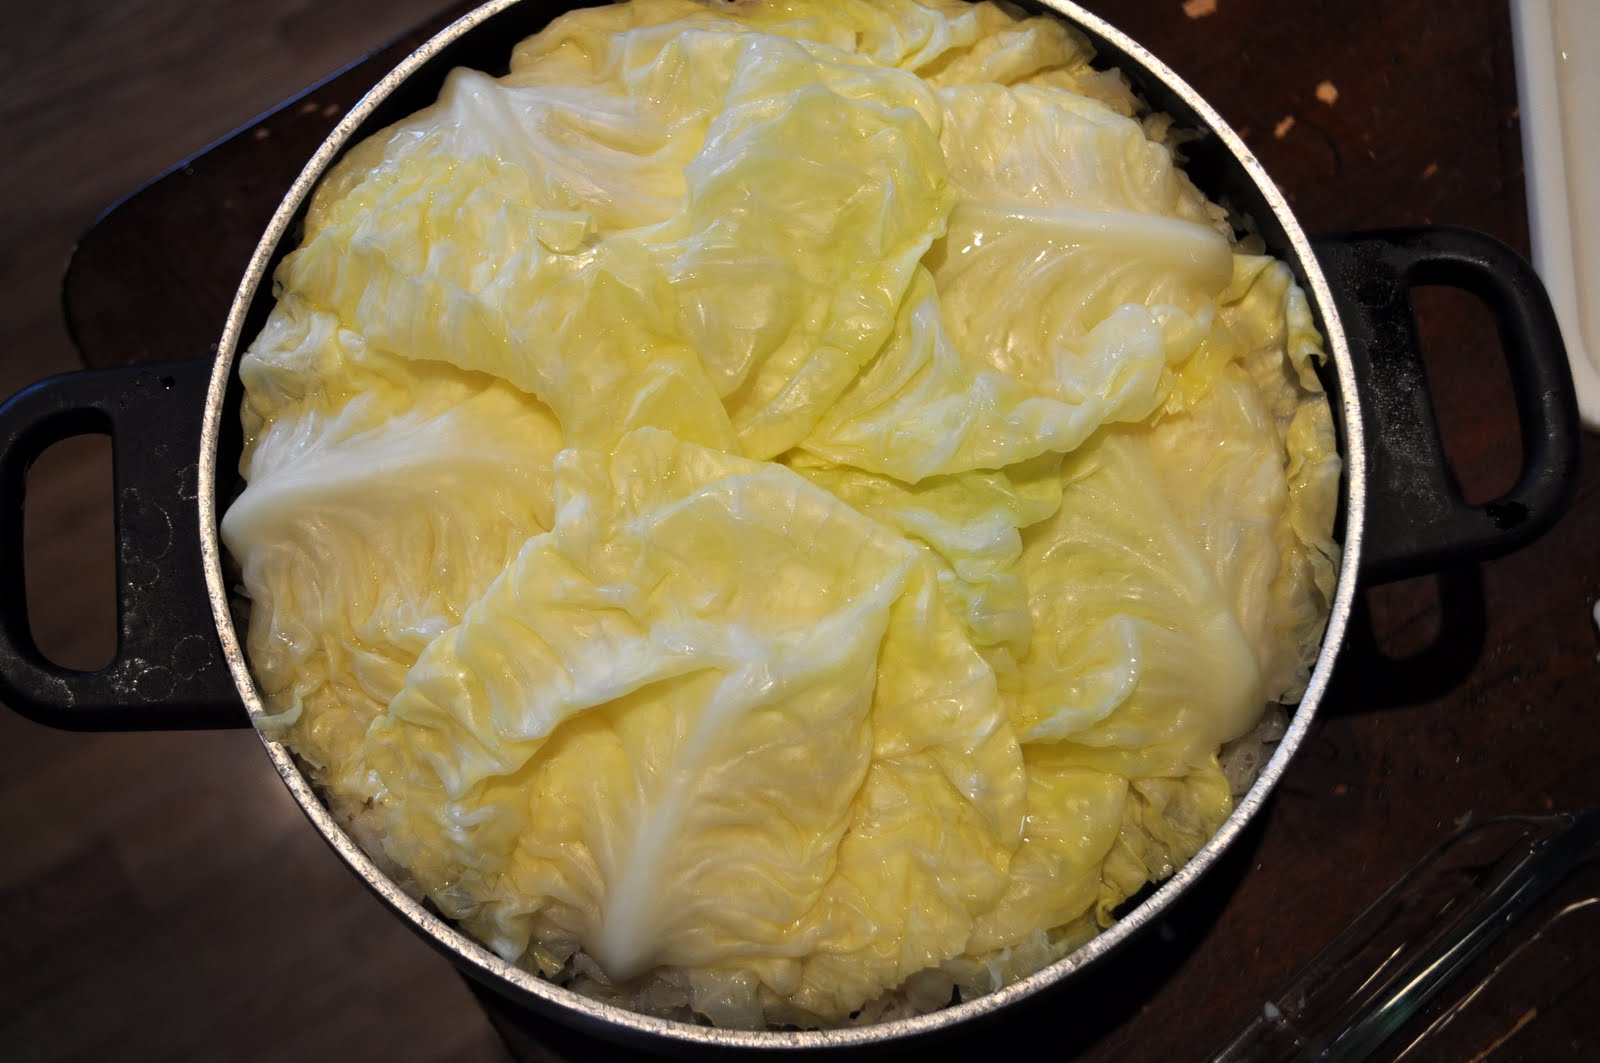
Cover tightly leaving about 1" to the top to prevent spillage. I use a broiler pan lined in tinfoil and place the pot on top of this to catch any spillage.

Cook at 325° for about 2-4 hours. When it's done, pretty much any green that was in the cabbage leaf will be gone and it will be clear or white. It's not the prettiest meal to eat, but it is one of the yummiest!!!


Monday, December 5, 2011

Baking Bread

I have a major fail in baking that I occasionally attempt. Making bread from scratch. Today a blogger that I follow "Knead to Cook" gave me a link to the perfect loaf of french bread.
Using the bread hook to knead the dough :)

It's pretty embarrassing... I mean, c'mon. Flour, Water, Yeast, Salt. 4 ingredients. How hard can this be? For some reason, I have been over thinking this whole bread thing.

But in a way, it's kind of a blessing in disguise. I truly am born a carb addict. And if I knew how to bake bread, I'd have been in big trouble at a much earlier age.

It's RISING!! This is a good sign :)

In college I lived on the East side of town and to get to the campus I had to drive down the road that housed a commercial bakery and a Mom and Pop bakery. I swear to God they pumped out the scent of that wonderful yeasty smelling bread as it baked.

I do believe I succeeded for the first time ever... well, sort of. I managed the measuring, I managed the mixing and the kneading. I even succeeded in raising the dough like Lazarus!! When it came time to forming and then moving the dough to the baking stone... well, lets just say it reshaped into a form that looked a little like a snake that swallowed something. LOL.

In the end, it was cut and had that beautiful crispy crust, butter was spread on it,the inside was wonderfully soft and the taste was perfect! Maybe I should say I formed the loaves like that on purpose????

To get the recipe, copy and past this link. Because I haven't quite figured out how to add a link to my blog so that you can just click on it. ;)
steamykitchen.com/75-baking-the-perfect-loaf-of-french-bread.html

Tuesday, November 8, 2011

Split Pea & Ham Soup - warms your chilly weather toes

My daughter in laws sister, Amanda, just started a new blog... and it inspired me to post again :) Thank you Amanda!!!

It always seems like I tend to kick up the cooking a bit when the weather gets cooler. I do like to turn that stove top and oven on but when it is hot out, we grill. Grilling, which I can do quite well by the way, seems to be the hubby's domain. I may have elected him to that spot, not sure if he chose it ;)

I notice that it's cooler when I find myself wearing socks constantly. I'm there now. Switching between my Smartwool and Acorn socks are keeping these tooties toasty. (those brands were introduced to me by my sister Gretchen in Maine.) Socks on the feet mean that I can use the oven and stove top and we aren't going to need the ceiling fan on to keep cool in the house!


And soup is always on the menu in the fall through the summer. Warm/Hot soup. There are wonderful soups for cool weather, for me... I like the warm/hot soups that are savory and filling. YUM

I grew up with a mother who made soups all the time. I was a picky eater, so I hated it!! All those nasty chunky items floating in the water that is flavored of beef, chicken, creamy... YUCK! Tomatoes, onions, celery, carrots... REALLY MOM???

What a foolish, foolish child I was. I would give anything to go back in time with the tastebuds I own now and enjoy her soups while she had her senses (taste/smell) and everything she made was incredible.

This recipe is from my sister Gretchen that she found. It's Split Pea and Ham. Mom is making it today, but I'm making her follow the recipe. She still cooks great, but the lack of smell/taste has affected her final product. I am assisting her in the kitchen, I imagine I'm annoying the hell out of her, but I've already caught her making a couple of major mistakes. EEEEK! Oh btw, my mom is close to 80. Should I cut her some slack??? NAH!!
GOTTA HAVE THE BREAD!!!!!!!!

Recipe

Split Pea & Ham

Yield : 6 portions
Ingredients

1 pound dried green split peas
5 cups Chicken Stock or canned broth
5 cups water
1 meaty ham bone, or 2 smoked ham hocks
2 ribs celery, leaves included, diced
3 tablespoons chopped fresh Italian (flat-leaf) parsley
½ teaspoon crumbled dried tarragon leaves
4 tablespoons (½ stick) unsalted butter
1 cup diced peeled carrots
1 cup diced onion
1 leek (white part only), rinsed and sliced
1 cup slivered fresh spinach leaves
2 tablespoons dry sherry
½ teaspoon freshly ground black pepper

Directions

1. Rinse the split peas in a strainer, and then combine them with the stock and water in a large soup pot. Bring to a boil.

2. Add the ham bone, celery, 1 tablespoon of the parsley and the tarragon. Reduce the heat to medium-low and simmer, partially covered, stirring occasionally, for 45 minutes.

3. Melt the butter in a saucepan over medium-low heat. Add the carrots, onion, and leek. Cook until the vegetables are wilted, 10 minutes. Add them to the soup pot, along with the spinach. Simmer, partially covered, 30 minutes.

4. Remove the soup from the heat. Remove the ham bone, and shred the meat from the bone, removing any excess fat. Return the meat to the soup.

5. Add the sherry, pepper, and remaining 2 tablespoon parsley. Heat through, and serve immediately.


© 1989 Julee Rosso and Sheila Lukins
Note from Cookstr's Editors

Thursday, August 25, 2011

Stuffed Mini Eggplant with Zucchini and 3 Cheeses


A friend has asked a couple of times to come up with a vegetarian dish. I actually love non meat food so I was looking forward to finding something really yummy. In addition, another person asked for a squash recipe! Okay, I can do this. No prob. As I was strolling through the Minneapolis Farmer's Market I came across these absolutely adorable mini eggplants! I had to get them. Even though I had no idea what to do with them. Snatched them up, yes I did :) Next down the line were these beautiful yellow and green small zucchinis. Summer squash, right there. Oh yah.

Next up was to find a recipe that used one or both of these. I did my faithful google search and found this wonderful recipe that not only used the eggplant and squash, it also called for 3 herbs I had in my garden. Mint, parsley and basil. Cha-ching. Hitting the jackpot now. And seriously, it had 3 cheeses in it. mmm yah.

In this pan slowly simmering and steaming are the chunks of eggplant scooped out from the insides, zucchini, herbs, oil, shallot and garlic. It smelled soooo good!!!!

The instructions did not tell me HOW to steam the eggplant in the pan, so I just figured the best way would be similar to doing big squash in the oven; cut side down. It came out perfect :)

Once the eggplant had softened enough it was time to stuff. Now the item to bake these lil fellas in was tough. I first tried a square baking pan. That didn't work, they fell right over. I just stared in my cupboard and zeroed in on the mini-muffin pan. Wah lah... it worked!!

Covered in tinfoil, baked in the over for 25 minutes, they came out steaming and looking beautiful. Topped with freshly grated Parmesan cheese, bake into the oven for 5 mn of melting and they are done!

RECIPE
8 mini or japanese eggplants
2 tsp extra virg olive oil
1 garlic clove, minced
1 shallot, minced
2 Tbl fresh basil
2 Tbl minced fresh parsley
2 Tbl fresh mint
1 medium zucchini (about 2 cups) pealed and chopped
1/2 cup dried bread crumbs
1/2 cup veggie broth
1/2 cup non fat or part skim ricotta cheese
1/4 cup grated Gruyere cheese
1 large egg
2 Tbl grated Parmesan cheese

Cut off tops of egg plants and scoop out inside leaving shell for stuffing.

Heat oil in medium sized pan over medium high heat. Add shallot, garlic, basil, parsley and mint. Reduce heat to medium and cook for 2 minutes. Add zuchhini & eggplant and stir well to blend herbs. Add vegetable broth and turn up heat to medium high until it boils. Cover pan and reduce to medium low and simmer for 15 mn. It needs to be soft enough to mash.

Once veggies have softened, remove from pan with a slotted spoon into a mixing bowl leaving liquids behind.

Place eggplants in pan, cut side down, cover and simmer until soft (NOT MUSHY)for about 10 mn. Turn oven on to °350.

Directions said to spray a square baking pan with non stick spray but they fell over for me. I used a mini muffin pan and it worked great. A regular sized muffin pan would probably work too.

Smash the eggplant/zucchini mixture until somewhat smooth. Add the ricotta, Gruyere cheeses, bread crumbs and egg. Mix well. Stuff each mini eggplant to the top. Cover the baking dish with tinfoil. Pop into the oven for 25 mn. Uncover the foil and top with parmesan cheese. Pop back into oven for 5 mn. until cheese has melted. ENJOY!


Wednesday, August 24, 2011

Janz Hot Dilly Beans

Really? The last time I posted was SPRING!!! Spring and Summer for me, is all about OUTSIDE! Up North boating, in the backyard by the pool, putzing in the garden, walks through the Park Reserve and just soaking up the warm weather.

When one lives in Minnesota the thought is always in your mind "winter is coming" even on the first day of spring, as the snow is melting, that goes through your mind. "WINTER IS COMING". Given that... it is my only excuse for not posting :)

What gets me back into the kitchen always is the canning of produce. I don't do a lot of canning, maybe some beans, tomatoes, jellies and jams. It's a simple simple thing to do, you feel like you are being "green" and you get to enjoy the summer's treat of produce in the middle of winter. In addition to having a stock of gifts that you can give throughout the year. Low expense gifts....who could resist this?

I was at the Farmer's Market in Minneapolis looking for some summer squash, peppers and tomatoes when I saw green beans. Mountains of green beans. The scent of dill was also heavily in the air. On a whim I picked up about 2.5 lbs of the beans, fresh dill, jalapeno peppers and I was ready to rock the Hot Dilly Beans at home.

Next stop was Fleet Farm to pick up more bottles. I love Fleet Farm, it always surprises me when I walk through... everything you need is at Fleet Farm. That could be a blog topic all on itself so I won't digress.

Of course, I had to reintroduce myself to canning and a recipe for Hot Dilly Beans. I had a wonderful dill pickle recipe from the web, a friend gave me her Dilly Bean recipe and then of course, I had to put my touch on it so the final product is the result of 3 recipes combined. (Recipe listed below)

First up was to clean the beans and cut them the size the need to be to fit into our bottles.

When you do this, just make sure the bean is about 1/4" below the rim of the jar. And you need to stuff them in as tight as they can fit. And no, I do not have Man Hands... my wonderful husband was helping me. :)

While stuff the beans into the jar, add in the dill, peppercorns, garlic and hot peppers. If you do it while stuffing the beans, so it's pressed against the glass, the final product looks so pretty. Especially if you are giving away as gifts.

As the stuffing commences there should be a large pot on your stove top filled with the mixture of water, vinegar and salt heating up. This will be poured into the jar of beans ect. And of course the giant pot of boiling water which will be your hot bath for the jars of beans. Do these two things before you even start cutting, cleaning and stuffing your jars with the beans. It takes awhile to heat up the hot bath.

Slowly lower your jars into the hot bath and it's always wise to have an extra pot of hot water on the side just in case the water does not cover the jars once they are all in.
What always confused me was the instruction... "let the jars sit in the hot bath for 15 mn" What does that mean? Does that mean that when I lower the jars into the boiling water, it should come up to a boil and thats when I start counting the minutes? NOPE. It means, bring that water up to a boil, lower the jars and from there... time it for 15 mn!!

Pull those processed beautiful jars of dilly beans from the water and let sit on your counter until they have cooled down :) Remember, you don't have to put these bad boys in the fridge to store, they can go in your cupboard! The biggest key is to wait 3 days to a week before you give them a try. Don't get impatient and open them up 15 mn after you pulled them from the water. They have to infuse the flavor and marinate until the delishness is ready!

Enjoy!! Eat them all by their lonesome, add them to your Bloody Mary's, chop them up and throw them on your salad. Whatever! Just enjoy :)

Janz Hot Dilly Beans
For the brine:
3 cups water
3 cups vinegar
1/3 cup canning salt (don't use table salt)
*Mix all ingredients together in a pot, bring to boil and turn down to keep hot until you are ready to pour over the beans.

For the Beans:
3 lbs fresh beans
whole peppercorns
Fresh Dill flower and stem
Jalapeno pepper
Whole dried hot red pepper
Whole garlic cloves peeled
*To each tall pint jar add 1 tsp whole pepper corn, 1 dill head with about 3" stem attached, start stuffing with green beans when it's about half full of beans, add the whole hot red pepper (you can add the pepper or jalapeno or both) & garlic so that it's up against the glass and then stuff the rest of the beans until you can't fit anymore.
*Note: I didn't know how hot the red peppers would be so I did one jar with one red pepper, one jar with 2 red peppers and another jar with 2 jalapeno peppers. I'm experimenting here to find out which is the hottest.
*Another note: The garlic came right from my brother Mike's garden. I love that :)
*After you have stuffed the beans, fill the jars with the hot brine until about 1/4" below the top. Wipe off the rims of each jar so the seal will be perfect and no bacteria will develop with a bad seal.
*Lower the sealed jars into the hot boiling bath water and immediately start timing 15 minutes.
*Remove after the 15 minutes and let sit. LET SIT FOR AT LEAST A WEEK to enjoy the wonder of the Hot Dilly Beans!

Monday, February 28, 2011

Waiting for Spring

Spring, I can't wait... because then summer is next. I love spring in it's own right. The smell of the snow melting is just as intoxicating as driving down bakery road up in St. Cloud in the morning. (E. St. Germain where the Hearth bakery lives) Spring is all about the scents. It's as if one can actually smell the grass growing and turning green.
Now that I have established how spring starts up the ole olafactories... it also, as stated first, gets me jonsin' for summer!! Summer. The pool. The scent (there it is again) of coconut and pineapple. Oh bring it on please! Enough of this winter goo. And no, I don't want to skip over spring, but I need to remember summer actually does happen in Minnesota!
Once again, my favorite blogger www.smittenkitchen.com has timed my need for a connection with summer to food. She posted a recipe today for Pina Colada Cake. The ultimate drink of pool time summer.
I of course proceeded to bake it and it turned out just beautifully. Very moist, wonderful quiet flavors of pineapple, coconut and rum!!!
My husband said nothing but garbled "mmm,num, num, mmm" the entire time he ate it and of course didn't want to waste that half piece my mom left behind. Because of course, after Mom ate the first piece she stated "you know I don't usually eat sweets, but I'll take another 1/2 piece" Why does she say that after everything sweet I bake???
Enjoy... make this cake... close your eyes and picture summer!!!
piña colada cake


Piña Colada Cake
http://smittenkitchen.com/2011/02/pina-colada-cake/

Note: Cream of coconut is different from coconut milk; it is a very sweet, thick white liquid while coconut milk is unsweetened, just water and pressed coconut flesh. I used cream of coconut because it had a stronger coconut flavor. If you can only find coconut milk, however, in one test of the cake (that was delicious but didn’t have the coconut oomph I wanted) I used a cup of it instead, used all of the brown sugar and added 3/4 cup granulated sugar.

If you cannot get fresh pineapple, grab a small can of pineapple (in 100% pineapple juice, not syrup). The juice in the can can be used for the glaze. You’ll get a sharper flavor, of course, from fresh pineapple.

Cake
2 cups (250 grams or 4 3/4 ounces) all-purpose flour
1 teaspoon baking powder
3/4 teaspoon baking soda
1/2 teaspoon salt
1 stick (113 grams or 4 ounces) unsalted butter, softened
1/4 cup light (55 grams or 2 ounces) brown sugar
1 tablespoon (15 ml) dark rum
2 large eggs, at room temperature
1 cup (237 ml) cream of coconut
1/2 cup (72 grams or 2 1/2 ounces) finely chopped fresh pineapple (or pineapple from a can, strained, juice reserved)

To brush over the cake
1 to 2 tablespoons rum (optional)
2 tablespoons pineapple juice (optional)

Glaze
1 cup (120 grams or 4 ounces) powdered sugar
Pinch of table or fine sea salt
1 1/2 to 3 tablespoons pineapple juice

2 tablespoons dark rum for sprinkling over cake (optional)

Preheat oven to 350°F. Butter a 9-inch round cake pan and line the bottom with a circle of parchment paper, then butter parchment. (Alternately, you can use a cooking spray, either with just butter or butter and flour to speed this process up.)

Whisk together flour, baking powder, baking soda, and salt in a medium bowl. In a large mixing bowl, beat butter and brown sugar with an electric mixer at medium speed until pale and fluffy, then beat eggs, one at a time, and rum. Add cream of coconut and mix; the batter will look curdly and worrisome but will all work out in the end. Add dry ingredients, half at a time, mixing and scraping down bowl between additions. Mix only until flour is just incorporated. Using a rubber spatula, fold in bits of pineapple.

Spread batter evenly in prepared pan. Bake until golden and a wooden pick inserted in center of cake comes out clean, 35 to 40 minutes. Cool in pan on a rack 10 minutes, then run a knife around edge of pan. Invert onto rack and discard parchment.

For extra flavor, while the cake is still hot you can brush it with rum or pineapple juice.

Cool cake completely at room temperature, or in the fridge if you are impatient for cake (who isn’t?). Once completely cool, place powdered sugar and salt in a small bowl with 1 1/2 tablespoons pineapple juice and whisk until a thick glaze forms. Thin glaze only as needed, adding additional pineapple juice a teaspoon at a time until glaze is just thick enough to pour. Pour glaze into middle of cake and if it’s too thick to crawl to the edges itself, nudge it with a spatula until the top is covered. Serve immediately or let it set in the fridge for 20 minutes or so.